Hi Developers,
Looking for an **example of how to use an action button in React Native**? This guide provides a simple and practical approach to implementing **floating action buttons** in your React Native app using the **`react-native-action-button`** package. Whether you want quick access to tasks or notifications, this tutorial will help you integrate an action button effectively.
Follow this step-by-step tutorial to add an action button with icons to your React Native project.
Step 1: Download ProjectRun the following command to create a new React Native project:
expo init ExampleAppStep 2: Install and Setup
First, install the required package for action buttons:
npm install react-native-action-button
For icons, install `react-native-vector-icons`:
npm install react-native-vector-iconsStep 3: Modify `App.js`
Update the `App.js` file to integrate the action button functionality:
import React from 'react';
import { StyleSheet, View, Text } from 'react-native';
import ActionButton from 'react-native-action-button';
import Icon from 'react-native-vector-icons/Ionicons';

const App = () => {
    return (
        <View style={styles.container}>
            <Text style={styles.welcome}>
            React Native Action Button Example
            </Text>
            <ActionButton buttonColor="rgba(231,76,60,1)">
                <ActionButton.Item buttonColor='#9b59b6' title="New Task" onPress={() => console.log("notes tapped!")}>
                    <Icon name="create" style={styles.actionButtonIcon} />
                </ActionButton.Item>
                <ActionButton.Item buttonColor='#3498db' title="Notifications" onPress={() => { }}>
                    <Icon name="notifications" style={styles.actionButtonIcon} />
                </ActionButton.Item>
                <ActionButton.Item buttonColor='#1abc9c' title="All Tasks" onPress={() => { }}>
                    <Icon name="checkmark-done-sharp" style={styles.actionButtonIcon} />
                </ActionButton.Item>
            </ActionButton>
        </View>
    );
};

const styles = StyleSheet.create({
    container: {
        flex: 1,
        justifyContent: 'center',
        alignItems: 'center',
        backgroundColor: '#F5FCFF'
    },
    welcome: {
        fontSize: 20,
        textAlign: 'center',
        margin: 10
    },
    actionButtonIcon: {
        fontSize: 20,
        height: 22,
        color: 'white',
    }
});

export default App;
Run Project
Start your React Native app using Expo:
expo start
Scan the **QR code** in the **Expo Go** app to test your implementation.
### 🖼️ Output Preview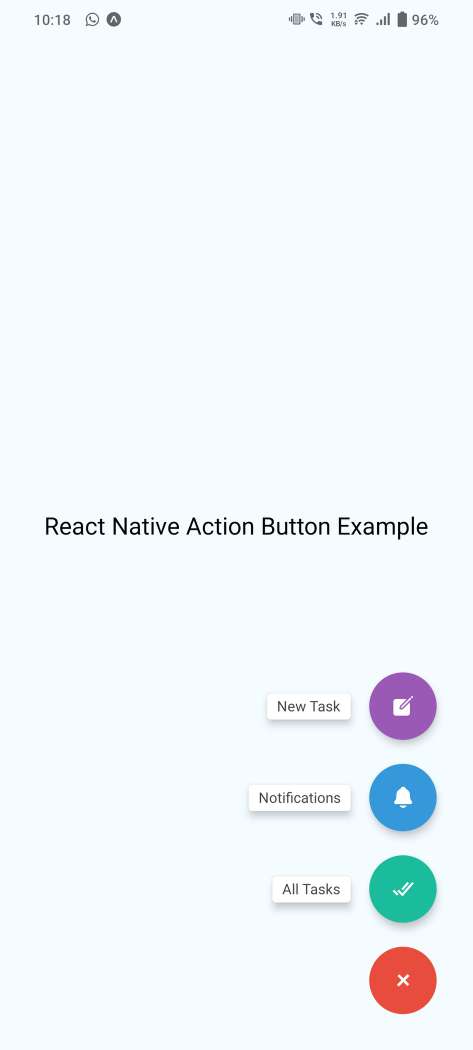
Q1: Can I customize the action button colors?
✔ Yes! You can modify `buttonColor` to any color you want.
Q2: How do I change the icons?
✔ Use `react-native-vector-icons` and replace the icon names accordingly.
Q3: Does this work on both Android and iOS?
✔ Yes, it works seamlessly on both platforms.
Q4: How do I position the action button?
✔ You can modify the **style properties** in `ActionButton` to adjust positioning.
Q5: Can I add custom animations to the button?
✔ Yes! You can apply animations using React Native’s built-in animation APIs.
Adding an **action button in React Native** enhances user interaction, making navigation quick and intuitive. Follow the steps above to implement a floating button with custom icons and actions.